The Vision
When first designing this home lab, I had a few major considearions...
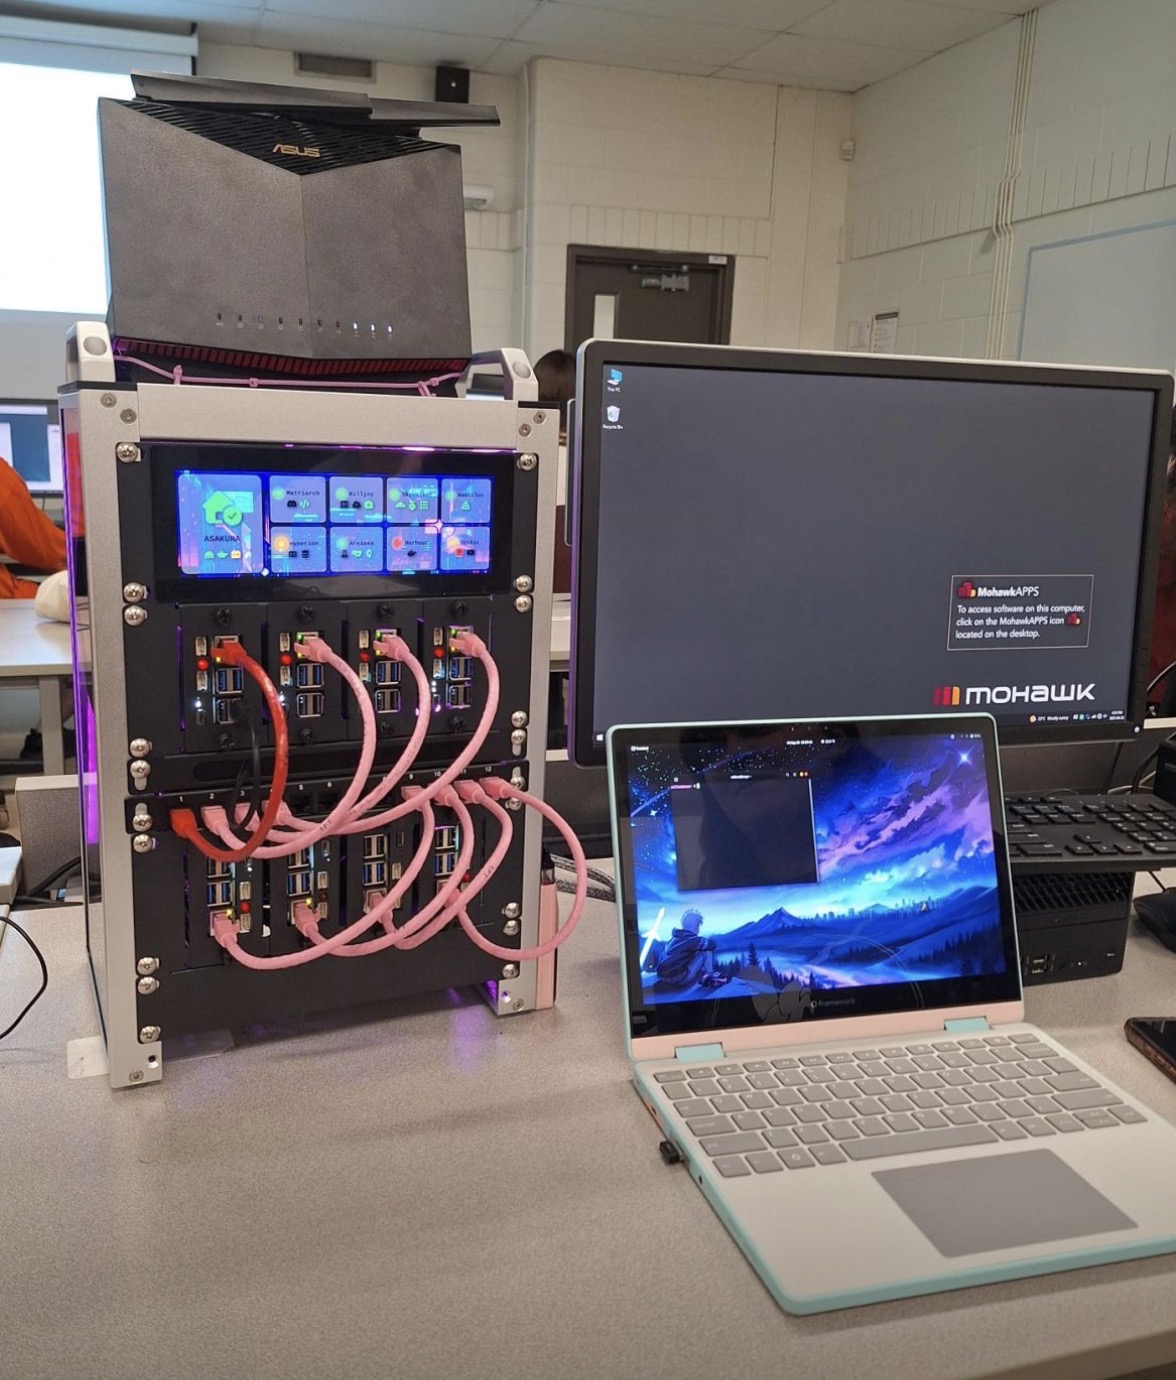
First off, it had to be something small because I don't have much space at home. A full 19" rack would be out of the question. When I spotted the Rackmate T1, I knew this would be a great little rack to place on my home lab. Cost was also an important consideration, so a smaller lab with SOHO gear sounded more appealing
Second, I wanted my home lab to simulate something that I could potentially see in a professional environment with multiple devices that need to be configured to work together. With multiple devices, I could get the hands-on experience to learn about zero-trust security within an internal network and practice other technologies. Being able to work with phyiscal devices instead of a simualted envrionment was definitely also more fun!
Finally, I wanted the parts in my home lab to be easily repurposable. When my career moves up, I'll eventually want to build bigger and better, so I didn't want to buy a bunch of equipment that was just going to go to a tech dump. I thought Raspberry Pi's would be great in this case considering their flexibility.
Back to TopHome Lab Hardware
Nodes
Each node is stacked with the following:
- An NVMe SSD daughter board with 1TB,
- A PoE hat to supply power and networking,
- Node-controlled fan for active cooling.
The daughter board connects to the Raspberry Pi through the PCI connector on the rear of the device. During my design phase, I did consider a hat which contains both PoE and an M.2 slot, but these daughter boards came with the 2U mount that I purchased. These daughter boards also allow me to use full 2230 M.2 NVMe SSDs.
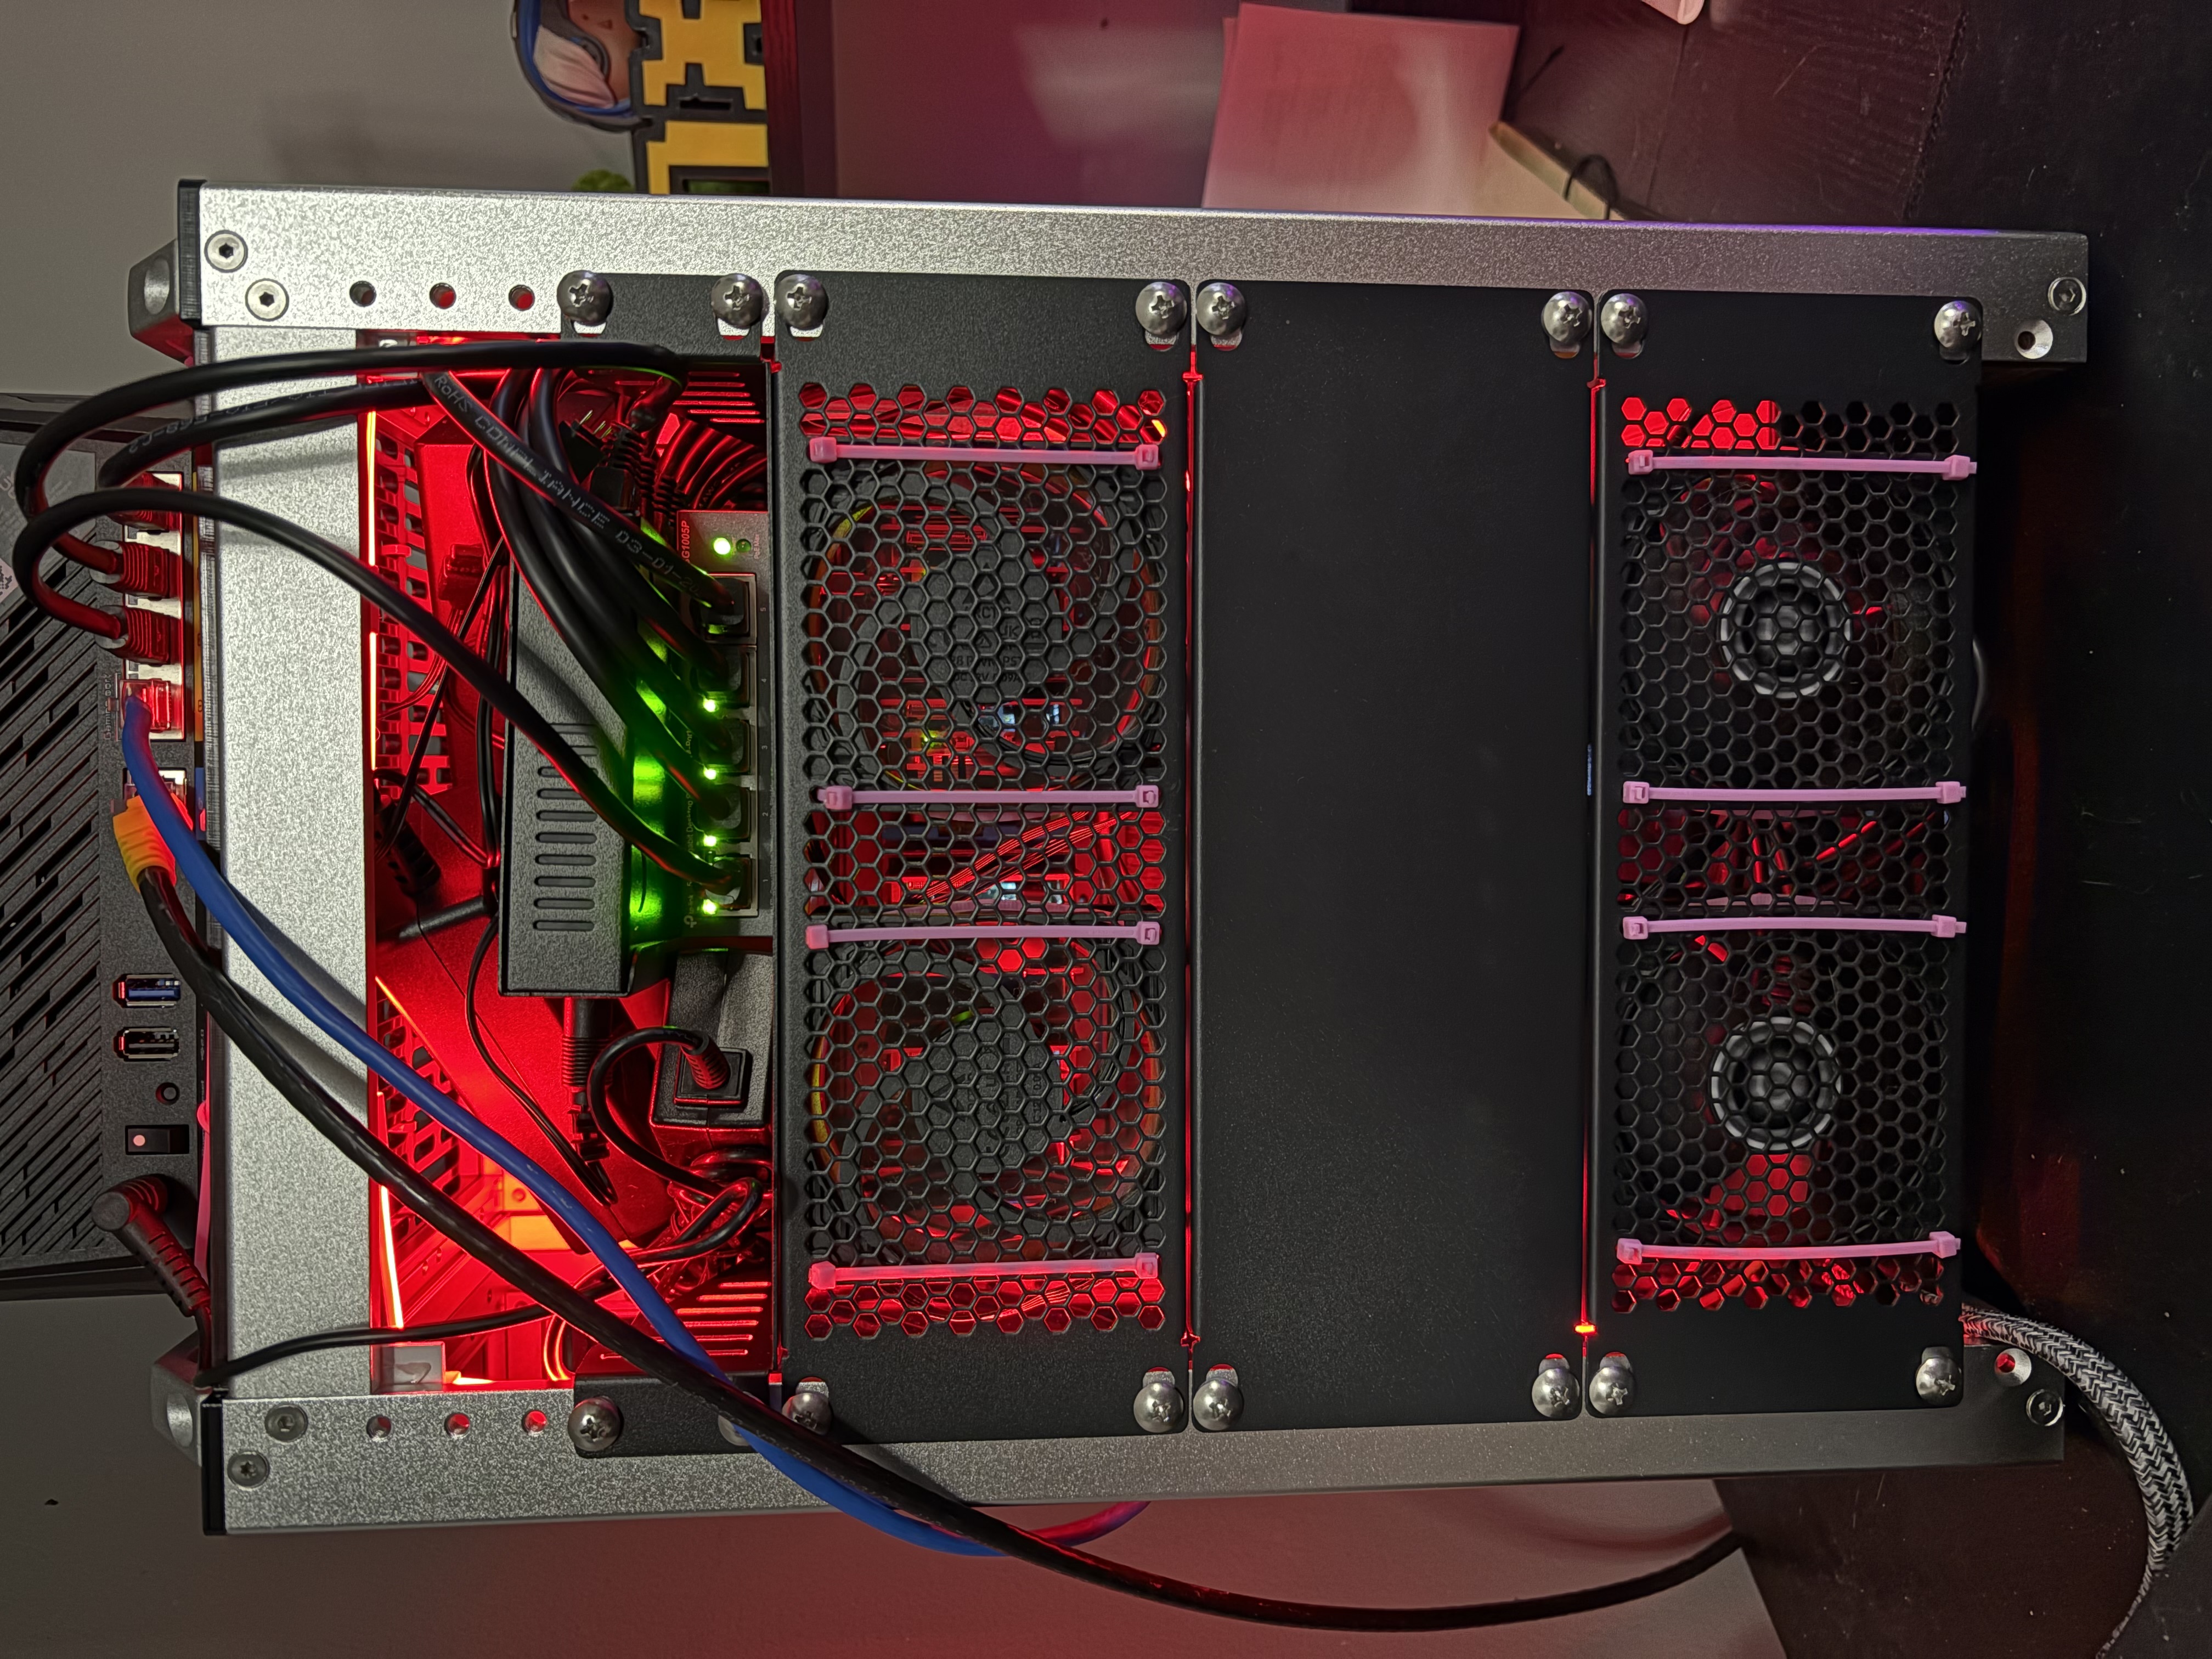
Cooling & Flair
On top of the fans attached to each Raspberry Pi, the home lab is also cooled with four 80mm PWM fans on the back. The fans as well as two addressable RGB strips are connected to a PWM aRGB fan hub.
PWM hubs are typically used inside of desktop PC cases, powered by a computer's power supply with SATA. Since this home lab doesn't have a power supply, a 12v AC/DC Molex 4-Pin power supply is used, then a Molex 4-Pin to SATA adapter connects to the hub.
Full hardware list:
| Hardware Name | Link |
|---|---|
| Raspberry Pi 5 8GB | https://amazon.ca/dp/B0CK2FCG1K |
| Waveshare Pi 5 PoE Hat | https://amazon.ca/dp/B0CR1JGP1Z |
| GeeekPi RackMate T1 8U 10" Rack | https://amazon.ca/dp/B0CSCWVTQ7 |
| GeeekPi 7.84" Touchscreen LED Screen | https://amazon.ca/dp/B0F3C5R2BZ |
| ASUS RT-AX86S 802.11ax Router | https://amazon.ca/dp/B09GP8PCF6 |
| Netgear GS308EP 8-Port Managed PoE Switch | https://amazon.ca/dp/B08MBFLMDC |
| TP-Link TL-SG1005P Desktop PoE Switch | https://amazon.ca/dp/B076HZFY3F |
| 52pi N07 NVMe SSD Daughter Board | https://amazon.ca/dp/B0CWD266XR |
| WD Black SN770 1TB NVMe SSD | https://amazon.ca/dp/B09QV692XY |
| Ocypus Delta EH10 PWM aRGB Fan Hub W/ Remote | https://amazon.ca/dp/B0DS5W2L66 |
| External AC Power Supply for Fan Hub | https://amazon.com/dp/B076WZ1N4K |
| Arctic P8 80mm PWM Fans | https://amazon.ca/dp/B09VDNGW8K |
| GeeekPi RS02 2U Rack Mount | https://amazon.ca/dp/B0DM9978LY |
| GeeekPi 12-Port Patch Panel | https://amazon.ca/dp/B0D5XPNHHF |
| GeeekPi 0.5U Brush Cable Manager | https://amazon.ca/dp/B0DKBG1KZJ |
| Low Profile 8-Port Extension Cord | https://amazon.ca/dp/B0CY5GBVVY |
| Addressable RGB Strip Kit | https://amazon.ca/dp/B09DSYZKV4 |
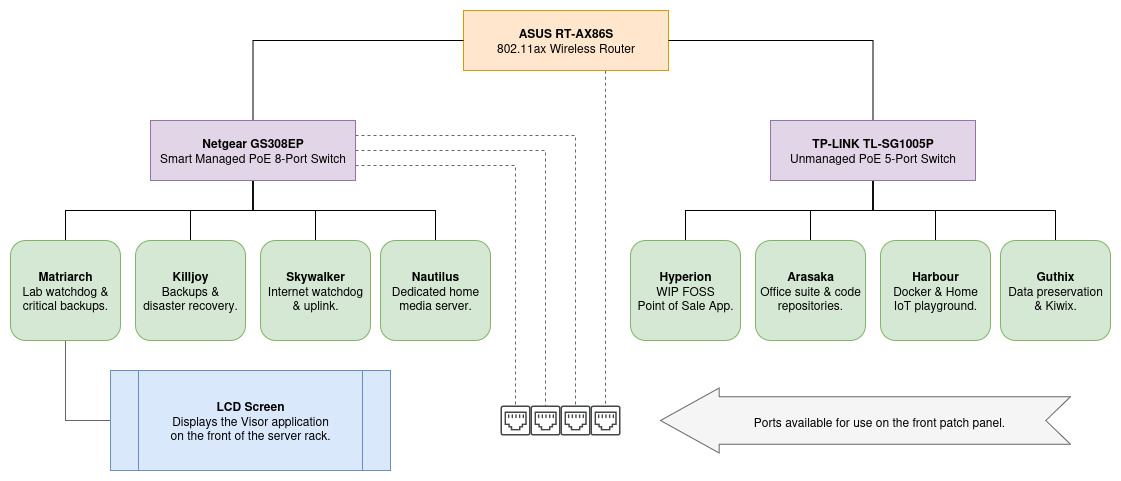
Network Topology
The home lab network uses a tree topology in order to maximize connection speed to the primary router. Each switch supplies PoE power and a gigabit connection to four Raspberry Pis. A 2.5Gig uplink is used to connect the home lab to the rest of the home network. Extra ports from the Netgear switch and the ASUS router are used for conveient use of the patch panel's unused ports.
While not displayed here, the ASUS router supplies DHCP functionality for the home lab including DHCP reservation for the Raspberry Pis. Upon first-time initialization, the Raspberry pi is automatically configured to the same IP address as the DHCP configuration.
 Back to Top
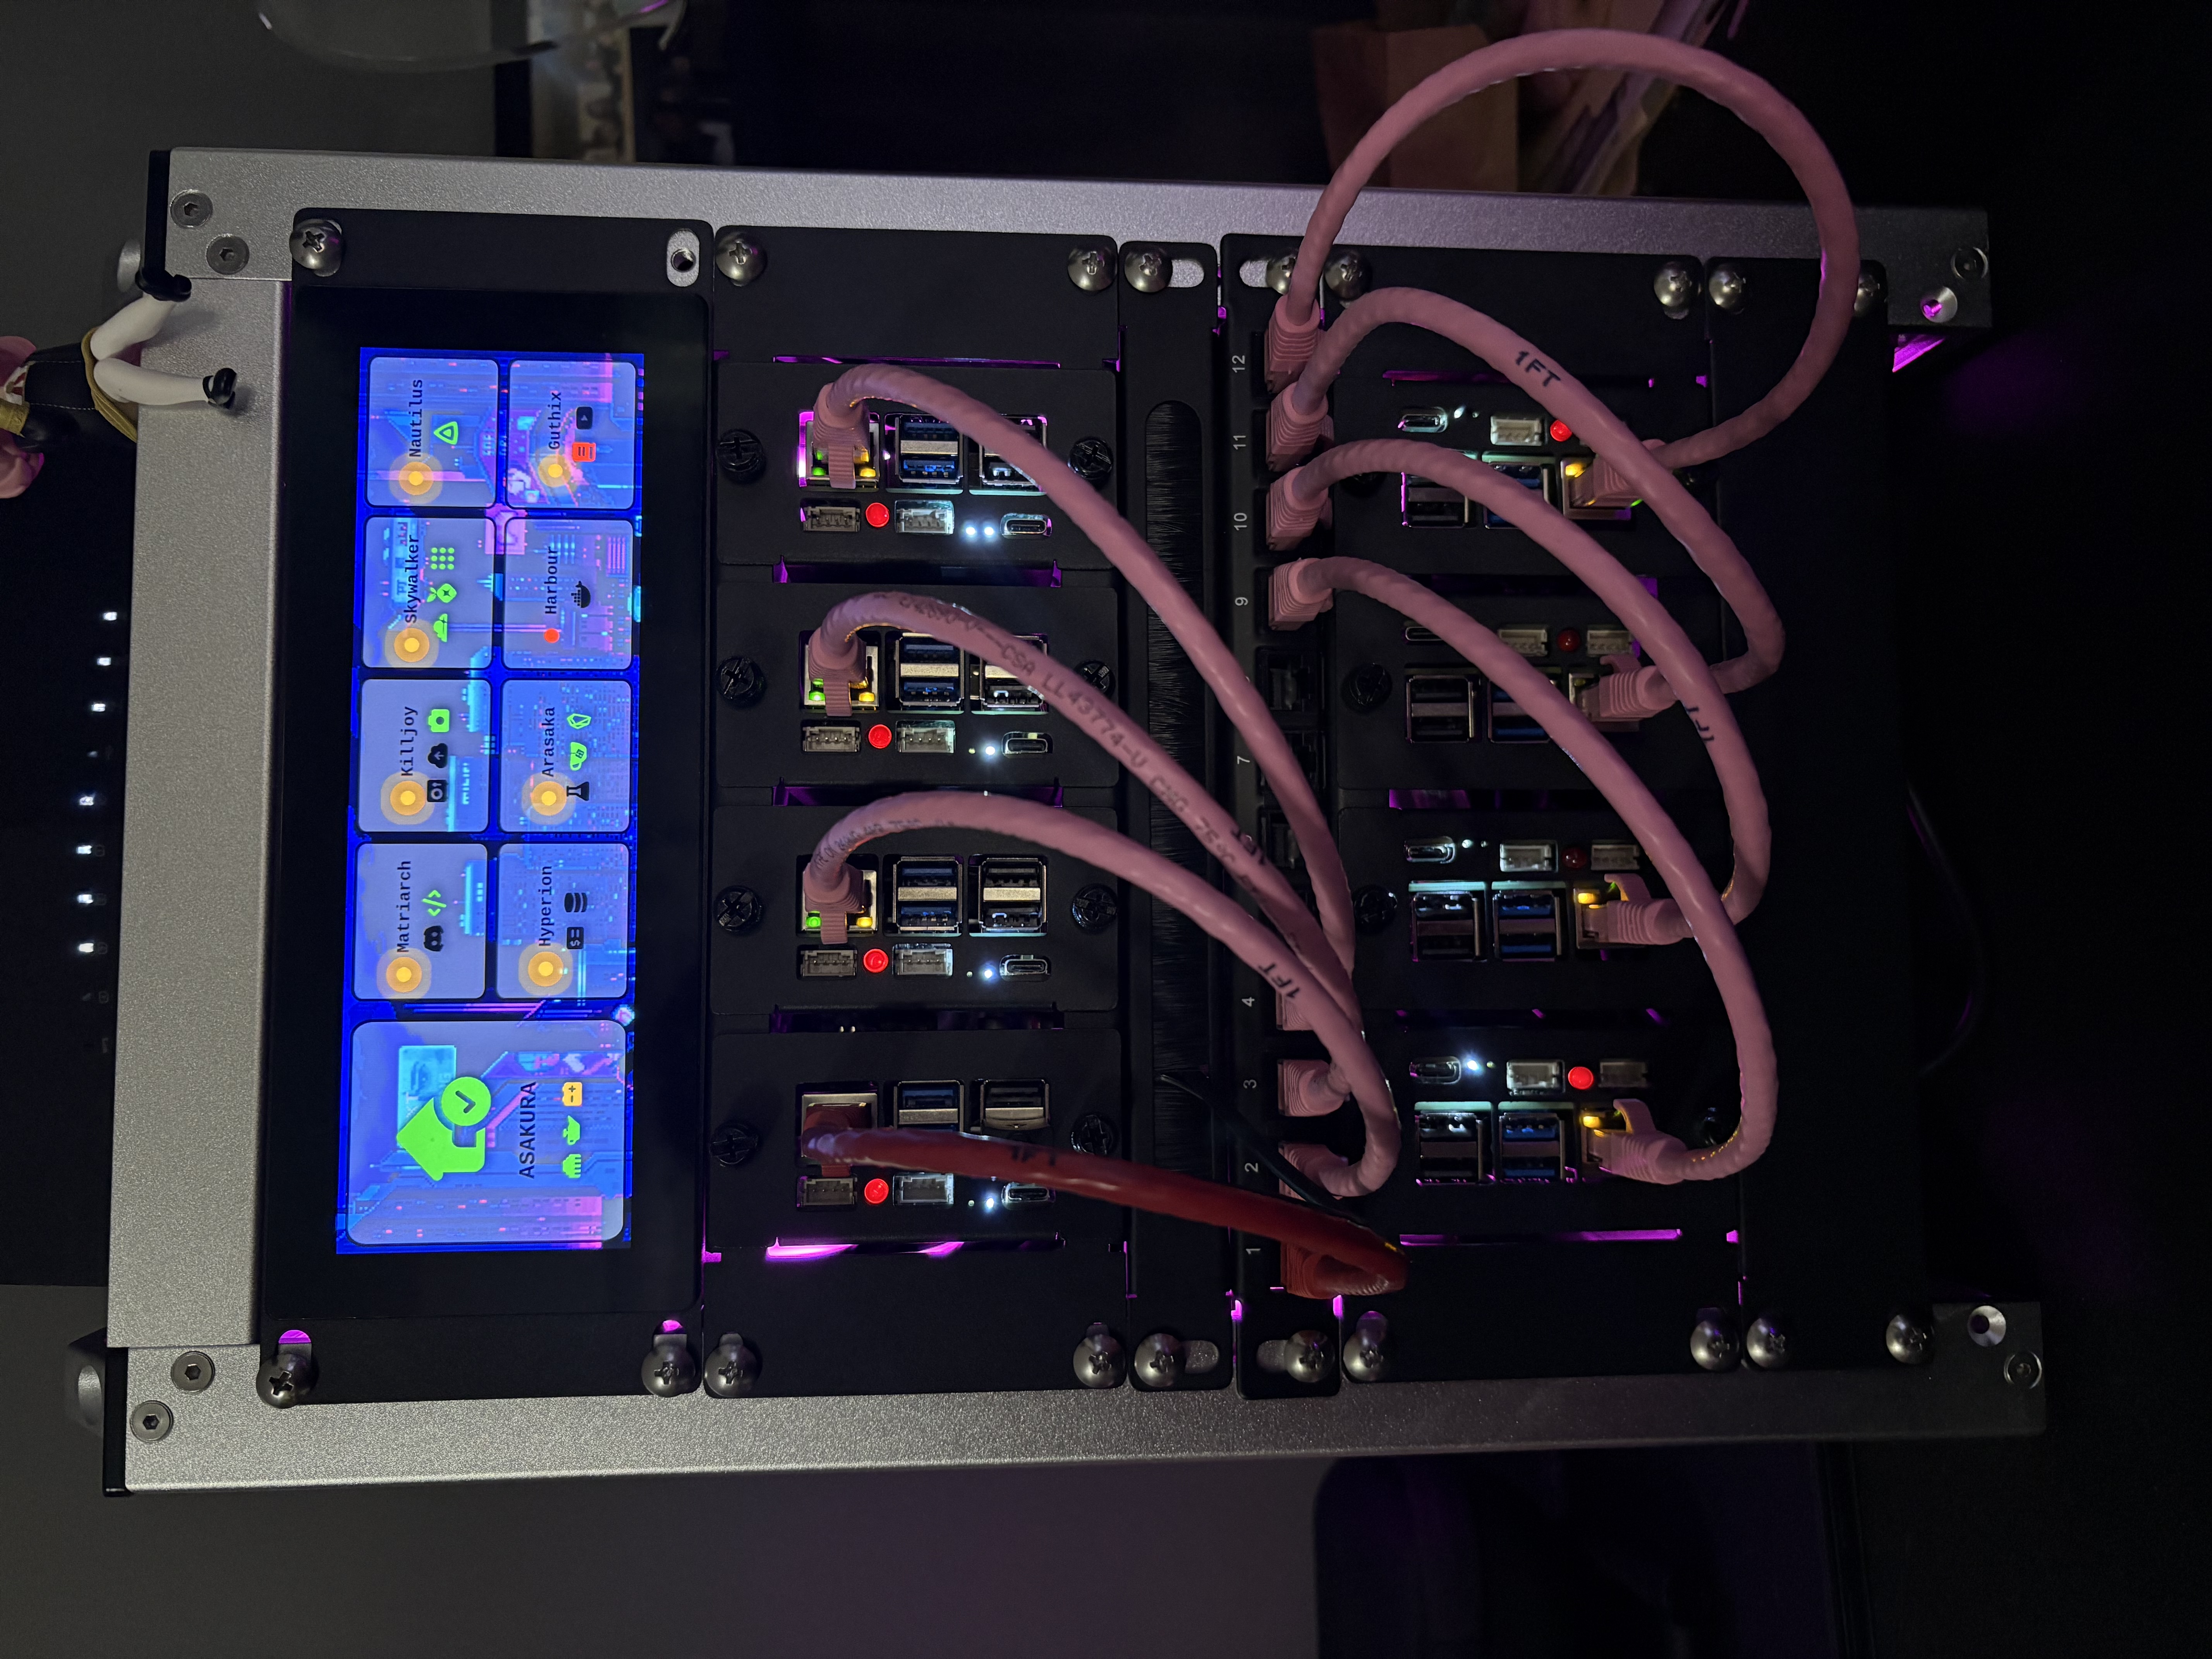
Lab Monitoring: Visor & Helix
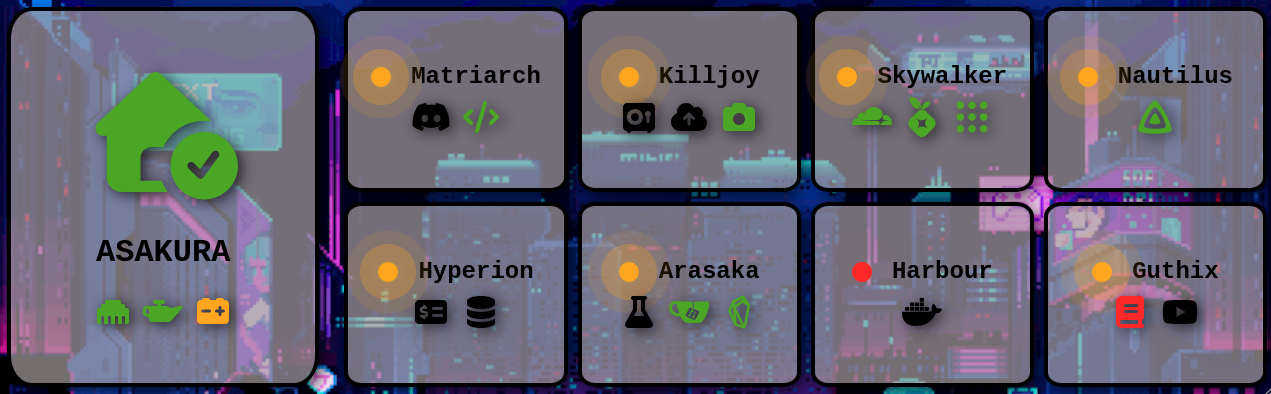
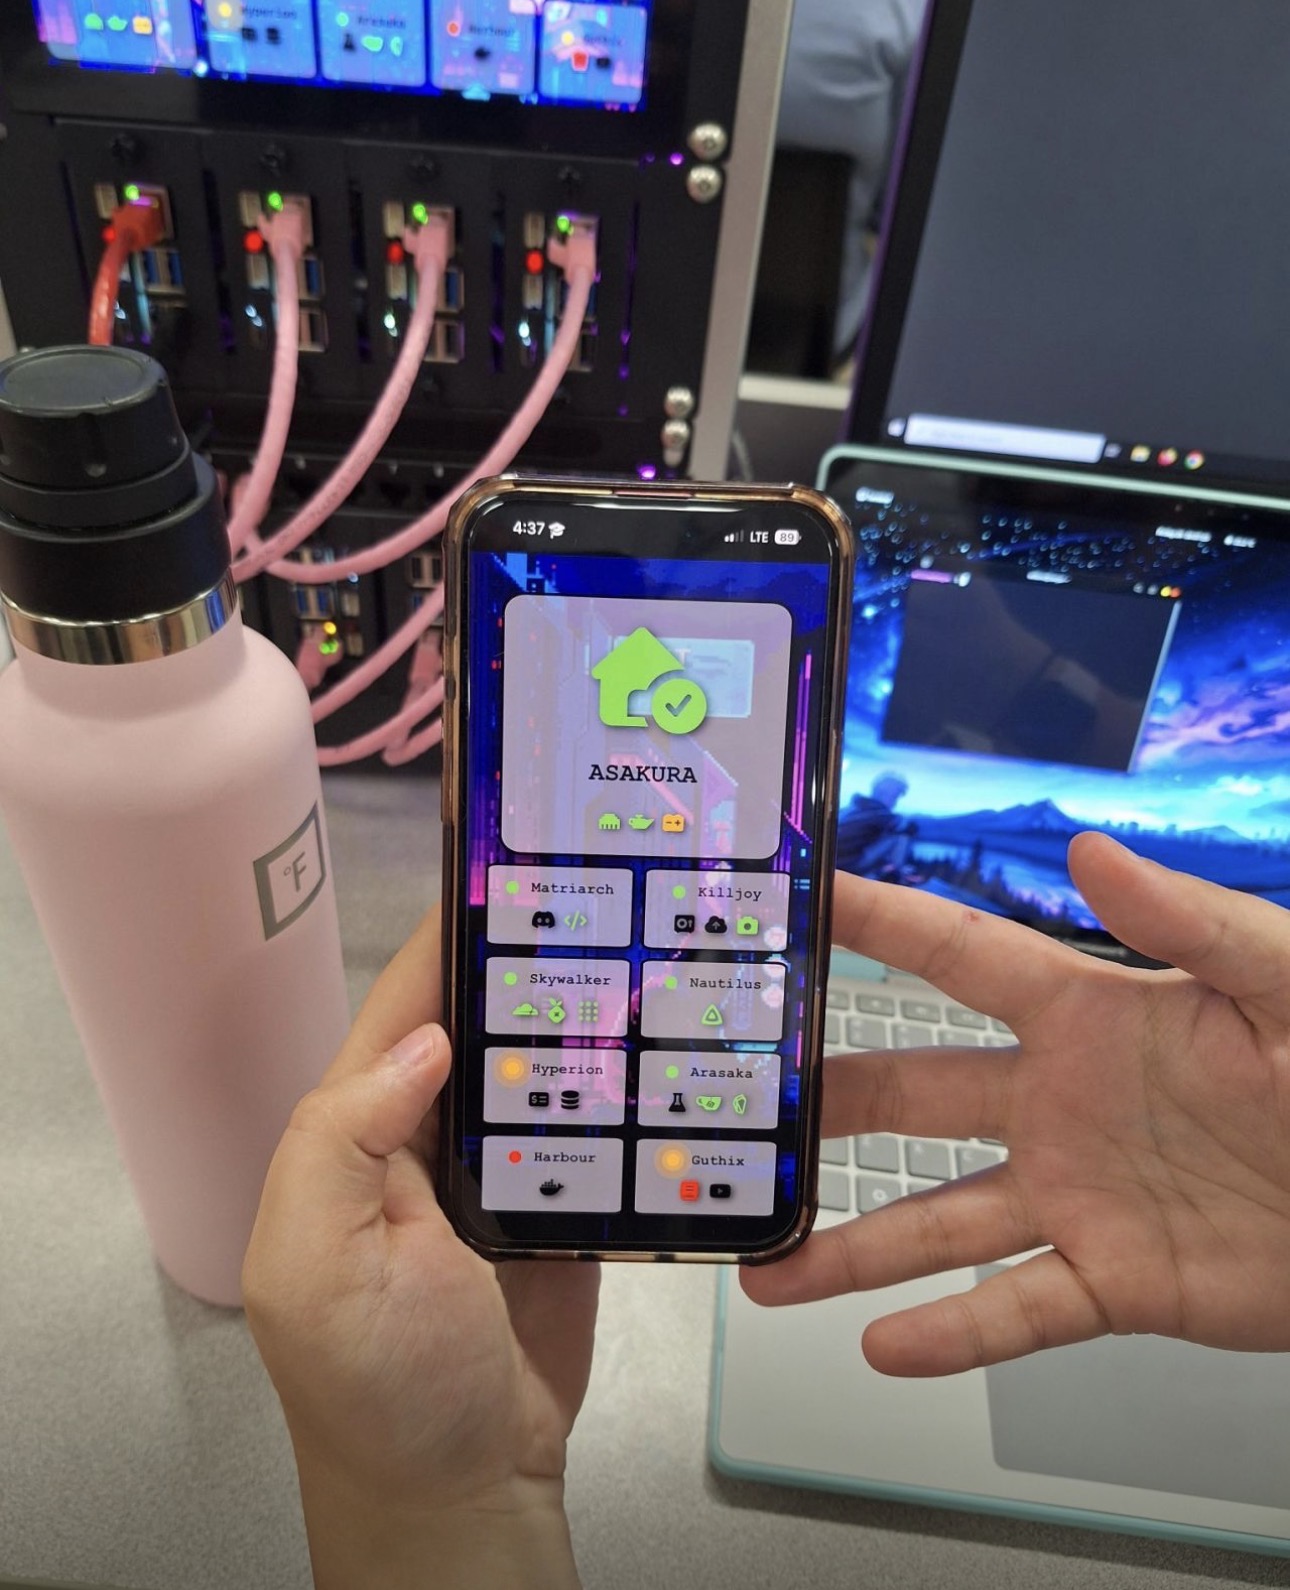
The app seen on the display of my home lab is of my own creation, I call it Visor and it gives me insight into how my home lab is doing. It was built with HTML, CSS, and JavaScript in a Node.js application running Express. While I could have run this app more lightweight with an Apache server, I wanted to start on a more scaleable framework. The overhead right now may be unnecessary, but upgrading in the future will be easy peasy.
For the LCD screen, I have a startup script that will open a Chromium tab in 'kiosk' mode and automatically in fullscreen mode. I have also designed the webpages to be available on desktop and mobile. Using a trick with Shortcuts on my iPhone, I can present the webpage as though it's a native app on my phone. Learn more on how I did this here
To get the reports to my Matriarch server, I created a set of shell scripts which I named Helix. It has multiple features, including:
- A deployment script to install/update helix from a single command across all 9 nodes. This script will also check to see if cron entires are properly configured and set them up if necessary.
- A JSON config to customize what I want reported from individual nodes,
- A JSON config & script set to check on the health of each service. It can either ping a port for a successful HTTP response code or reference a dedicated script to check for service availability.
- A script with multiple functions to build detailed reports, placing them in an NFS share to be accessed by Visor.
Future Goals
- While this home lab has a total of 11TB between all 8 nodes, I hope to expand my storage capacity outside of the case by introducing a NAS to my home lab envrionment. For now, I'm simply using a few NFS shares and backup utilities.
- I definitely want to pick up a mini PC such as a Lenovo Thinkcentre M980 or something similar so I can explore Windows Server, Active Directory, etc.
Honorable Mentions
I would like to extend a special thanks to all of the content creators who have inspired me over the years. Computer science has become a lifelong passion of mine and it's the people in the list below who have inspired me to learn, experiment, build, and even at times, destroy.
- Linus Tech Tips
- SomeOrdinaryGamers
- NetworkChuck
- Technology Connections
- Kevin Nanns
- Jeff Geerling
- Tracketpacer
- John Hammond
- Code Bullet
- Chiefgyk3d
- Gamers Nexus